Custom Cable Adapters
While the list of chairs that the AutoLeveler is currently compatible with is growing, your chair may not be on that list yet. If your chair has a power tilting seat (not just a reclining back) and you are interested in using an AutoLeveler, keep reading!
With hundreds of chair models and after-market seat modifications available, there are lots of variations of seating systems out there! So we can create a cable customized for your chair, we’ll need a little help from you. The steps below are pretty detailed but don’t worry, it’s actually pretty easy!
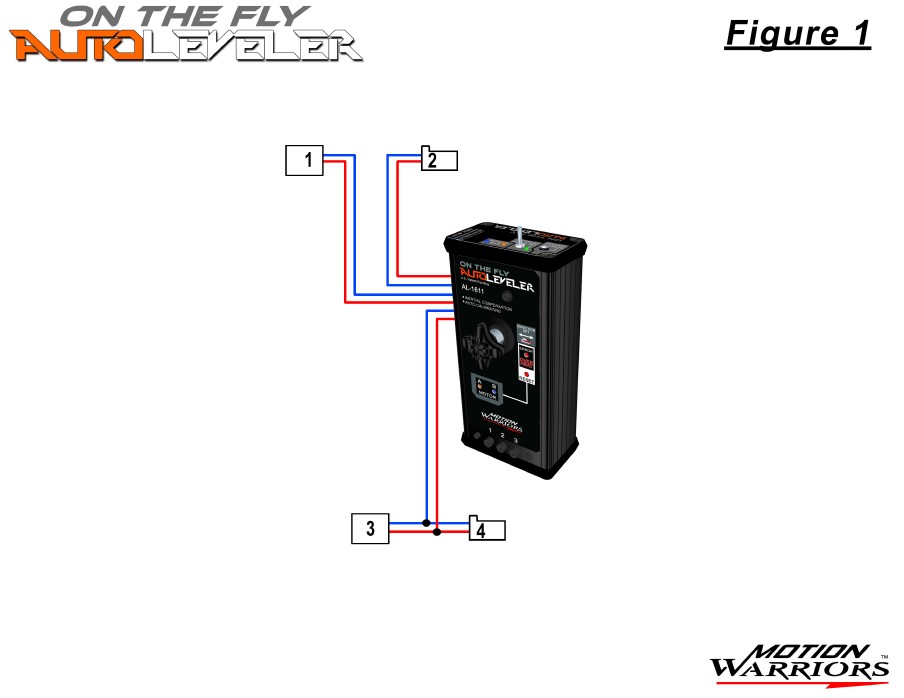
All AutoLevelers come with a cable with connections to the seat tilt mechanism and power supply on the chair. Figure 1 illustrates the standard cable configuration. Connectors 1 and 2 intercept the motor signal while Connectors 3 and 4 intercept the power. We need to know how to connect each of those to your chair.
The steps below are somewhat generic to make them as widely applicable as possible. Your chair will probably be some variation of these examples. If you have questions about your chair’s setup, please reach out to us – we’re here to help!
Step 1 – Determine how your seat tilt is controlled
The seat tilt mechanism is typically controlled in one of two ways.
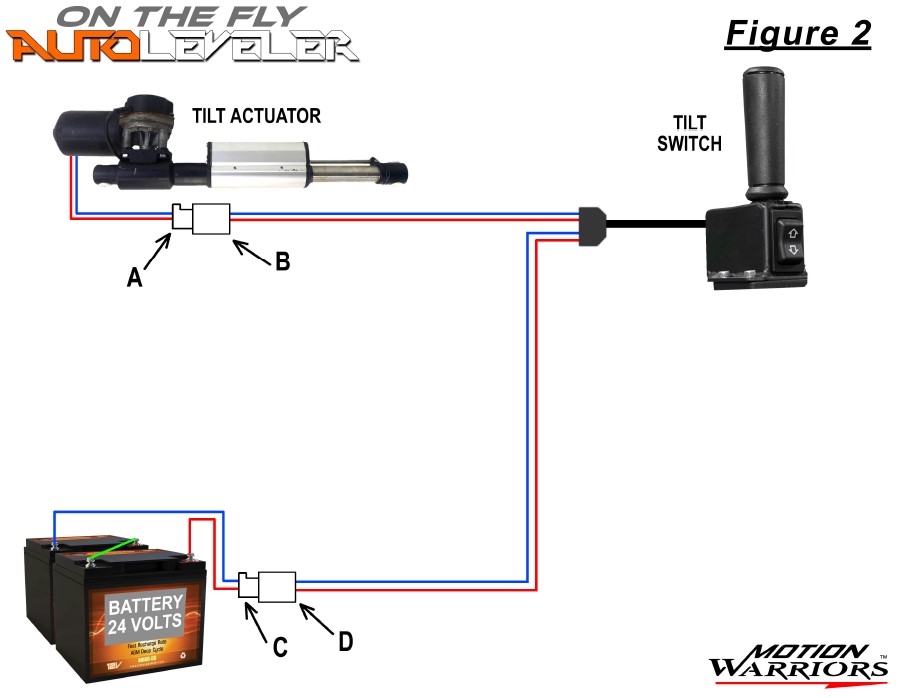
- Switch Method. In this method, the tilt mechanism is controlled by a separate switch independent of the chair’s controller (Figure 2). A cable coming out of the switch will split into two cables, with one going to the tilt actuator and the other going to a battery. Your chair may have come with this switch already built-in, or your chair may have been modified, either by you or a supplier.
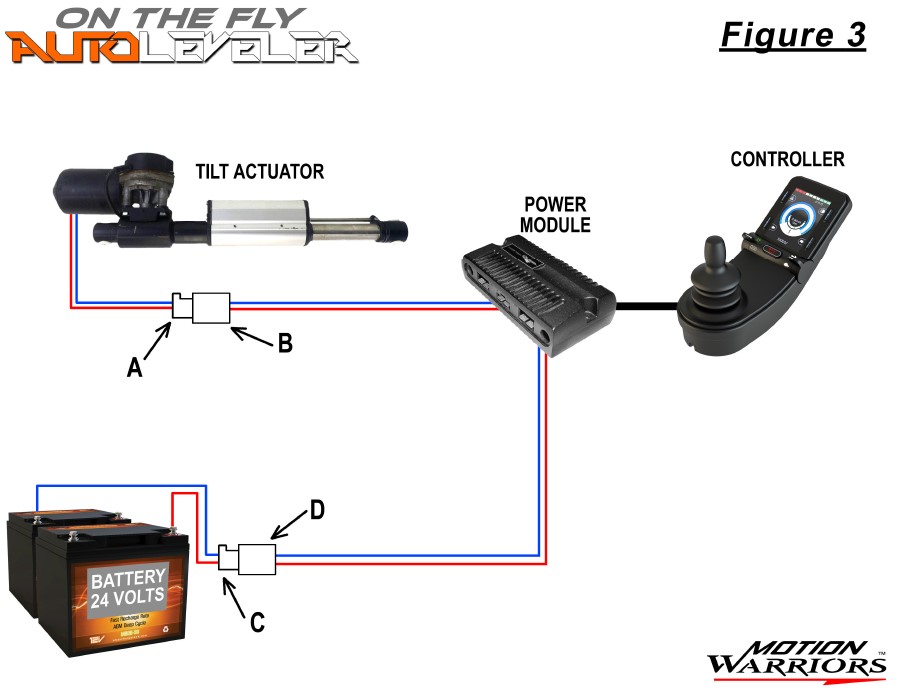
- Controller Method. In this method, the tilt mechanism is controlled by the chair’s controller, which is connected to a power module (Figure 3). The power module drives all of the chair’s motors, including the tilt actuator.
Step 2 – Take photos of the connectors
In order for us to create your custom adapter, we need to see the connectors on the motor wire and the power wire. As fun as it would be to come visit you and take a look ourselves, there just aren’t enough hours in the day! So, we need you to take photos of those connectors for us.
For the Switch Method (Figure 2):
- Motor wire. Locate the tilt actuator motor. There will be two wires, a plus and minus. Follow those wires to the A connector. You can continue following this wire to the tilt switch so you know which wire coming out of the switch goes to the motor and which goes to power.
- Power wire. Follow the power wire from the tilt switch to the D connector.
For this method, we only need photos of the A and D connectors.
For the Controller Method (Figure 3):
- Motor wire. Locate the tilt actuator motor. There will be two wires, a plus and minus. Follow those wires to the A connector.
- Power wire. Power can be intercepted at the D connector or anywhere 24V power is available on your chair (for example, a bus bar or auxiliary power jack).
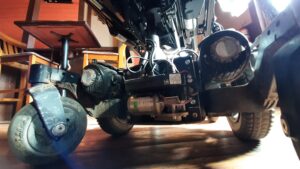
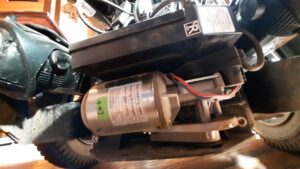
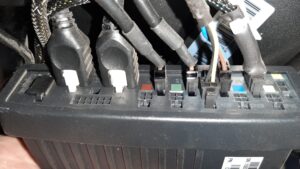
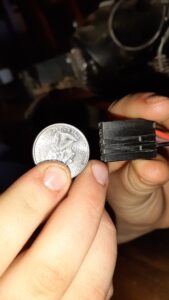
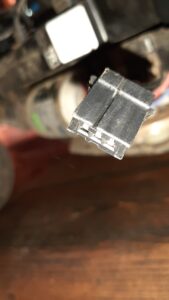
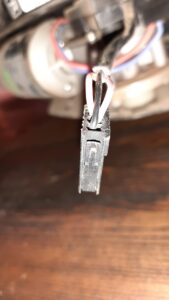
For both methods, disconnect the connectors and take a photo of each; include a quarter for size reference and please make sure they’re in focus! Overview shots of the tilt actuator and power module are also helpful. Below are a few examples from a Permobil chair so you can see the type of photos and angles that are most helpful to us.
Step 3 – Send us your info
Send us an email at mobility@motion-warriors.com with the following:
- Your connector and chair photos – please label so we know what we’re looking at!
- The model of chair
- Any modifications you’ve made relating to the tilt function. Model and part numbers are helpful too.
Our engineers will take a look to see if we have what we need to move forward – we might need a follow-up email or phone call to clarify some details. Although developing the custom cable for your chair is free, we may ask for a partial payment toward your AutoLeveler, with the balance due when we’re ready to ship you your AutoLeveler and custom cable.
Step 4 – Hook it up!
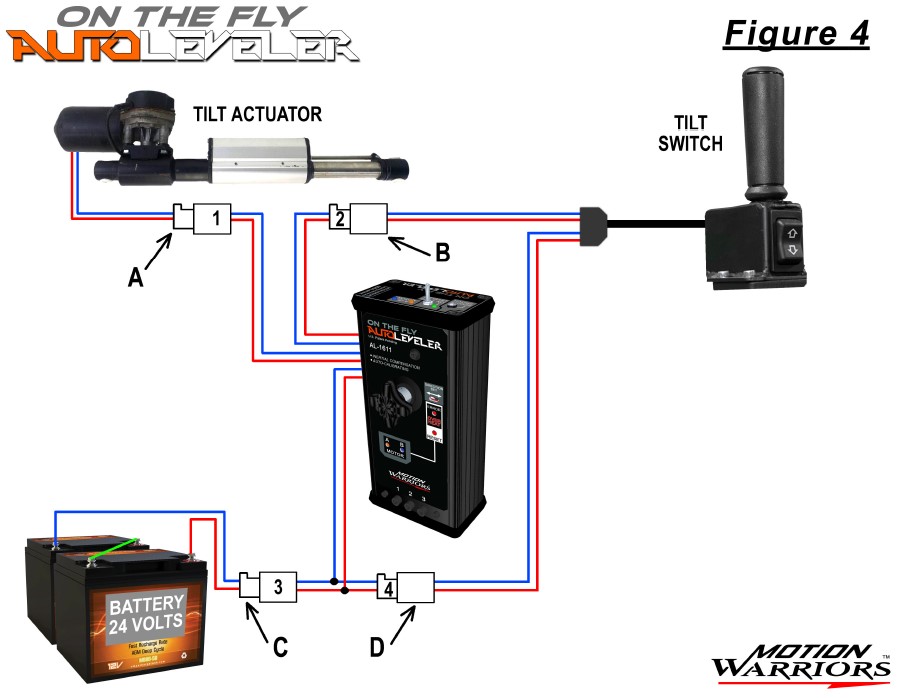
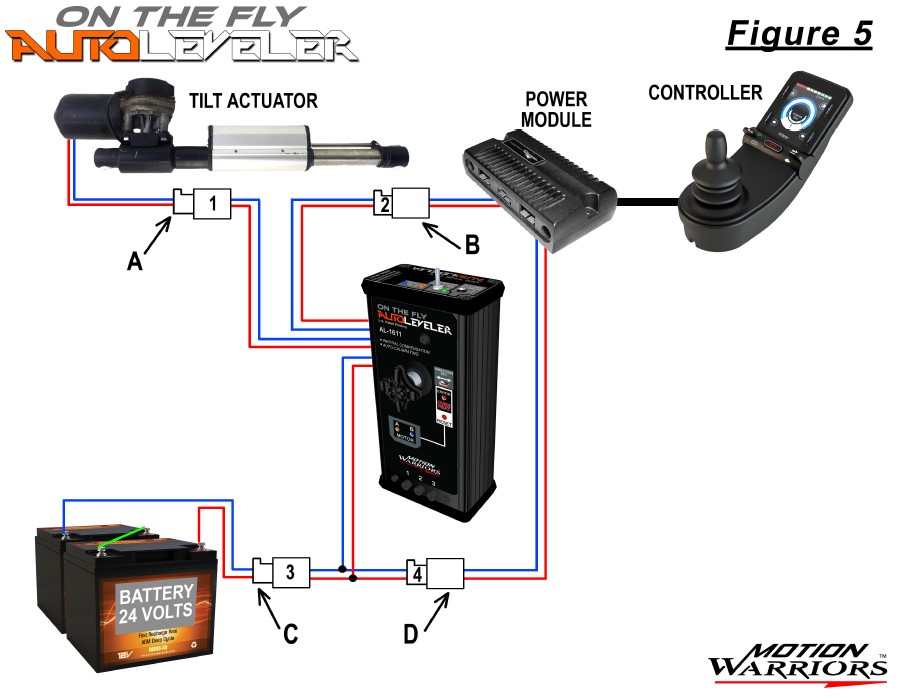
Once you receive your AutoLeveler, hook it up to your chair. Since we don’t have your chair to record a video of how it hooks up, we’ll provide you with some instructions and you can use the diagrams below to see how it works. Figure 4 shows the Tilt Method and Figure 5 shows the Controller Method. In both cases, the AutoLeveler cables now intercept the motor signal and the power.
If for whatever reason the AutoLeveler doesn’t work on your chair, let us know and we’ll do some troubleshooting with you over the phone. If we still can’t get it to work, return it in its original condition within 14 days for a full refund.

